Showing posts with label Photography. Show all posts

Announcing a Winner!

Congratulations Amanda Perry!
You have won a Full Event pass to Phoenix Comicon 2016!!
This pass will get you in all 4 days.


It appears that many of you want to see photos from Phoenix Comicon.
Here are links to my previous con photos:
Phoenix Comicon 2015
Phoenix Comicon 2014

Let's get this party started!

For those of you who didn't know, I am an official photographer for Phoenix Comicon, and it is coming up soon! (June 2-5)  I am so excited to share a great opportunity with you and get a bit of feedback in return! I am doing a free giveaway of this Full Event Pass (all 4 days) for @phoenixcomicon to one of my fans! Here is how you can enter the drawing!

1) Like Bright Photography on Facebook
2) Follow @dbrightphotos on Instagram
3) Like Phoenix Comicon on Facebook
4) Follow @phoenixcomicon on Instagram
5) Like Comicare on Facebook
6) Go to www.brightphotosbydanielle.com and comment on the latest blog post what you would like to have me discuss (or) tell me a concept you have that would be fun to create as a photograph.                    
7) Share this post.
8) Come back to this post and comment to let me know you've done these
You can share each day until May 31st for additional entries, just come back each day to let me know you've shared again.

Good luck to you all! I can't wait to see you at Comicon!
(This giveaway is not affiliated/associated with Facebook/Instagram/Phoenix Comicon)

Mommy So Pretty!

One of my favorite memories was of a time when my mother let my brother and I do her hair and make-up. It was a rare treat to play with colors and relay our creative abilities onto her willing canvas, a.k.a her face.
Children have so much love for their mothers and beam with pride whenever they share their drawings.  I came up with this concept a while ago and as it is Mother's Day weekend, I thought the timing would be perfect. I sent out a message on Facebook and invited all women with children ages 2-5 to come to my house for a special photo shoot. I informed them that they need not do their hair or make-up as that would be done for them before the photo. I carefully avoided telling them until they arrived that their own precious toddler would be their make-up artist and hair stylist. While reactions ranged from welcome to apprehensive, all the moms stayed and had a fun time watching their children make them so pretty. I have included the documentary photos as well as the portraits to this blog. 


Mr D. took a while warming up to playing with the make-up. But once he did, it was wonderful. He chose to put a tiara on his Mommy.


Since this little guy is the only boy in his family, he doesn't get too many opportunities to do fun make-up stuff with Mommy. This was a great bonding activity. Look at the focus on his face!


Miss M. focused much of her artistic attention to only one side of her Mommy's face. Still so pretty!


My friends were complaining that I wasn't getting a make-over, so I joined in the fun with my youngest daughter. She wanted to put make-up on herself almost as much as she wanted to do put it on me. I am pretty good at directing a shot, but I am so awkward in front of the camera. My sweet husband helped take my photo.


Some of the Mommies chose to reciprocate the love by putting make-up on their children. Note: There really is no way to pose a toddler, I just have to shoot and pray that I got a good shot. Sometimes toddlers give me the best poses like the one below. 


This poor Mommy was doubly decorated, as both her little girls participated in making her so pretty. The hair style is great too!


I made sure that the children wore large shirts so they didn't get any make-up on their clothes, and sheets on the Mommies for the same reason. Looks like the sheet was slipping in this shot. 


The stylish Mommy is wearing green eyeshadow on her forehead and blue mascara this season. At least that is what Miss H. had in mind for her favoritest Mommy ever. 


Miss A. believes that it is all about vertical line patterns. One must also apply every shade in the lipstick pallet directly to the cheeks


I am so grateful for the wonderful participants for this project. It was so much fun!
If you liked this entry, go check out Adults eating like Babies!

Ghosting on Halloween

I would first like to state that this project is best suited for those who can sit still for a long exposure. Let me share some of my more successful attempts at this strategy before going into the tutorial.

This image of the water spirit was my first attempt at "Ghosting" back in 2011. It took a couple tries, but luckily my parents were good sports.


 On Valentine's Day this year, I drove down to Tombstone for an assignment and met some very agreeable patrons who willingly posed at the Birdcage Theater and Doc Holliday's Saloon.


I needed one more so I called a friend and put her in a costume that my brother altered for a previous event and took her out to the desert to pose as a frontier woman. 


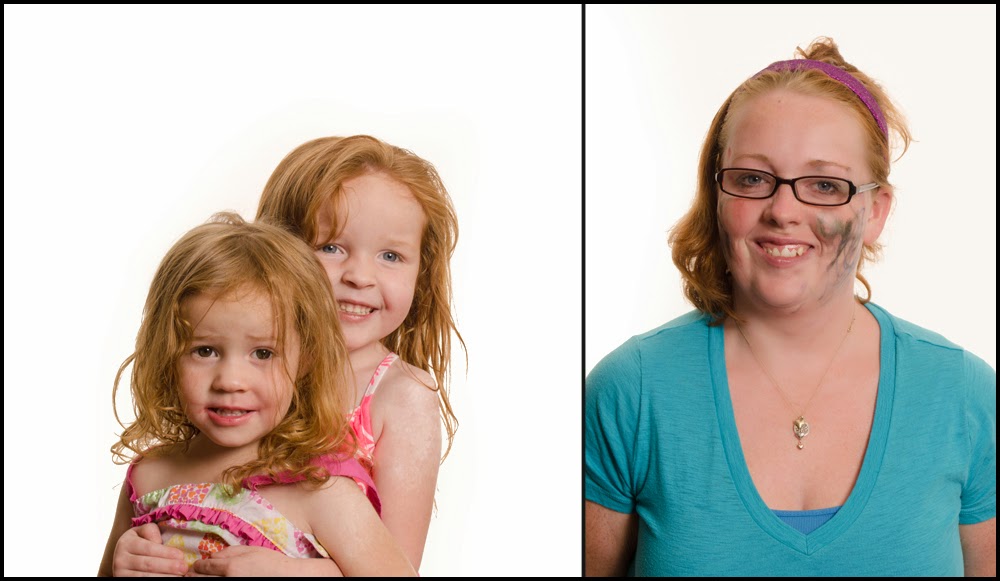
Just this morning I got the great idea to attempt "Ghosting" my kids in their costumes out on the road. 
The technique is not too hard. Like I said though, it takes a model who can hold a pose for a few seconds.

What you need:
SLR or DSLR Camera  set to manual mode
Tripod
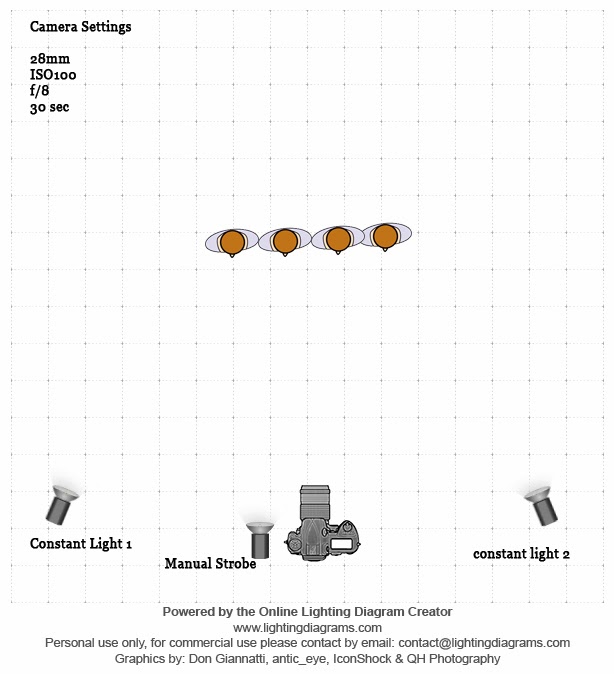
1-2 constant light sources
1 strobe
dark or dim lit location

Here is the diagram I made using an online Diagram Creator

These are suggested camera settings. Feel free to bracket them as you see fit. The lights can be moved around as well. This is just how I set them up this evening. 

I set the shutter speed to 30 seconds with the aperture at f/8 and ISO100.
With the shutter being open that long, it is imperative to have a tripod so your background stays sharp. 
The constant lights will be on the whole time aiding in the exposure of the image. 

Now here is the trick for the treat.

Have your model pose at the desired distance from the camera. Press the shutter release button on your camera. If you have your strobe synced to your camera, that works great; if not, fire your manual strobe quickly after pressing the shutter release. 
Count to 3
Have your model hastily move out of the frame until the shutter closes. 
This will take a few tries, but in the end, it is a fun effect. 


I would love to see the images you create with the "Ghosting" effect!
I hope you all had a safe and fun Halloween.


Color Correction Tutorial - PS

I finally found a moment to edit an image for a tutorial for all of you. I chose shot from my very first wedding. At that time I was still shooting Auto/JPEG and didn't have Lightroom or Photoshop to edit. Basically, I was as amateur as you could get. This tutorial is for very basic color correction in Photoshop without the use of Auto Color or Auto Tone.

As you can see, there is a blue color cast from the shadow of the building. 
Let's take care of that with Curves!


Select the Adjustments icon and click Curves. The easiest way to take care of the white balance is by using the eyedropper tool and picking a black, grey or white part of the image. Since both are wearing white, I chose the white eyedropper and picked the lightest white in the image. I believe I chose a spot on the groom's collar. I highly suggest visiting Digital Photography School - Practical White Balance


Well, gosh, there is still that blue color cast on the bride's dress, so let's choose the selective color adjustment layer and lighten the blue and cyan. That's better!


Time to merge those layers!


I personally like to add a curves layer and then blend it as an overlay at 20 percent opacity, but that's just me. 
Hmm, their skin looks a bit flushed, lets's take care of that.

This is why you don't use an action on every image, because they usually need to be treated individually. I just made a few adjustments in the Red selective color adjustment layer. 


Their skin looks a lot better now. Let's put some pink back in the bride's lips.
Select the mask (the white part) and pick out a small paintbrush and paint her lips with the black paintbrush. This will put the red back. 


We are going to stop here. Stay tuned for teeth whitening and eye brightening in a later tutorial. If you liked this tut, leave a comment. Thanks!